You found the perfect shower cap — and your hair is still damp when you take it off. Frustrating doesn’t even cover it.
A wet interior isn’t always a sign of a bad product. More often, it comes down to fit, material, or a sneaky culprit called condensation. Most people never think to address that last one.
Your shower cap keeps getting wet inside after every wash? Or you’re shopping for something that will protect a fresh blowout or color treatment? The fix is closer than you’d expect.
We’re breaking down why it happens, how to wear your cap the right way, and which materials deliver on their waterproof promise.
Why Does Your Shower Cap Get Wet Inside?
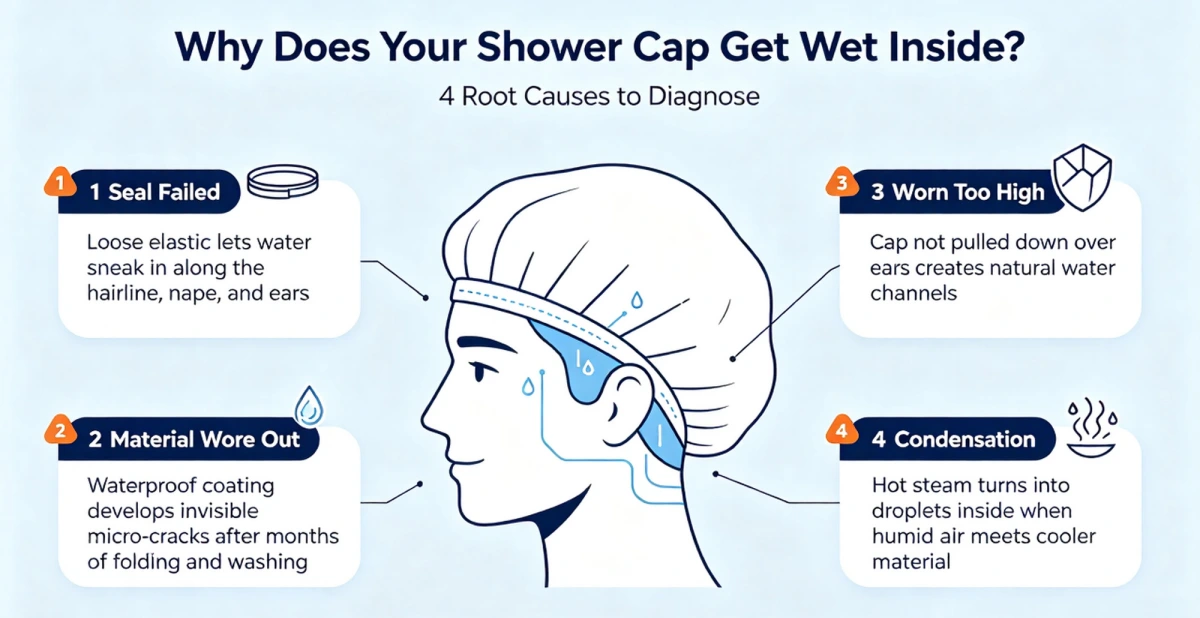
A shower cap generally fails in four ways. Knowing the exact cause saves you from throwing away a perfectly good cap or buying a new one when a simple adjustment would do. Let’s break down what’s really happening.
1. The Seal Failed (Water Sneaked In)
Elastic bands lose their stretch over time, especially in hot, humid bathrooms. If your cap feels loose or you notice consistent wet patches right near your hairline, nape, or ears, the seal is giving out. Even a tiny, unnoticeable gap lets in enough water to soak your roots.
2. The Material Wore Out
Waterproofing eventually breaks down. Coated caps (like PU or PVC) develop invisible micro-cracks after months of folding and washing. If the entire inside of an older cap feels uniformly damp, the material itself is leaking. It’s time for a replacement.
3. You’re Wearing It Too High (A Quick Fix)
Leaving your front hairline slightly exposed or failing to pull the cap completely down over your ears creates natural channels for water. Always press the edges down securely around your entire head. If the same spots get wet every time, just adjusting your technique will fix it.
4. Condensation (The Hidden Culprit)
Sometimes, it’s just physics. Hot showers trap steam inside the cap. When that humid air meets the cooler outer material, it turns into liquid droplets. If your cap has a perfect seal but the interior feels evenly damp after a steamy shower, condensation is to blame. Try lowering the water temperature.
Quick Diagnosis: Find Your Fix
Symptom | Most Likely Cause |
|---|---|
Wet only at hairline/ears/neck edge | Seal failure or poor fit |
Damp all over (older cap) | Material degradation |
Specific spots get wet, fixed by adjusting | Wrong wearing method |
Uniformly damp after a hot, long shower | Condensation |
Try the ultimate test: take a cooler, shorter shower while pressing the edges down firmly. If your hair stays completely dry, you’ll know exactly what needs to change.
Step-by-Step: The Correct Way to Put On a Shower Cap (Zero Leakage Method)
Most shower cap failures happen in the first ten seconds of putting it on. The placement decision you make before a single drop of water falls — that’s where leakage is won or lost.
Here’s the exact sequence that closes every gap.
Step 1: Prep Your Hair First (This Part Most People Skip)
Before the cap goes anywhere near your head, your hair needs to be low and flat. A high bun at the crown of your head will lift the cap’s front edge 3–10 mm off your forehead — and that gap is all water needs.
The target shape: a flat, twisted bun sitting 3–5 cm below the back of your skull, close to the nape hairline. Keep it tight — 4–6 cm diameter, no thicker than 3 cm. Use 3–4 clips to press the edges down flat.
Got thick or long hair? Split into two low buns, one behind each ear. This spreads the volume side to side. You avoid one thick pressure point that pushes the cap edge up.
Step 2: Position the Cap — Forehead First
Hold the cap with both hands: one on the front edge, one supporting the inside top. Place the front rim 5–10 mm below your natural hairline. Low enough to catch every flyaway. High enough not to press on your eyebrows.
This positioning sets your waterproof seal line. Every step after this depends on getting it right.
Step 3: Pull Over the Ears — Full Coverage
Slide the elastic band down one side of your face. Pull it until the band wraps the base of your ear, covering at least the top half of the ear cartilage. Repeat on the other side.
The common mistake: pulling it back behind the ear, but not in front. That leaves a 5–15 mm gap at the top of each ear — a reliable entry point for water every single time.
Step 4: Lock in the Back
Use both hands to pull the elastic down toward the nape of your neck. The band should sit at about the same height as your front hairline. This forms one continuous seal around your entire head.
Press the band down with your fingertips all the way around. Feel air moving as you press? That gap is 2–3 mm or wider, and water will find it.
Tuck remaining hair upward and inward, working from back to front. Don’t pull forward — that drags the front edge loose.
The Headband Trick (Worth 60 Seconds of Your Time)
Wear a 5–8 cm wide elastic headband underneath the cap, lower edge right at your hairline, upper edge mid-forehead. The cap’s elastic band then sits on top of the headband, not pressed against bare skin.
This creates a second physical seal at the exact spots most prone to failing: the forehead and above the ears. It works best for fine hair with flyaways or light waves that push the cap edge outward.
Quick Self-Check Before You Step In
Run one finger along the entire cap edge. Press it inward. Feel a distinct puff of air at any spot? That’s your leak point. Adjust the band position or tuck more hair before you turn the water on.
The whole process takes under 90 seconds once you’ve done it a few times. That’s a fair trade for dry hair.
How to Reduce Steam and Condensation Inside Your Shower Cap?

Steam doesn’t care how well you sealed the edges. A cap that fits well with zero leakage can still feel damp inside after a long, hot shower. That’s pure physics working against you.
Here’s what happens: hot, humid air gets trapped inside the cap. It hits the cooler outer wall and drops below the dew point. Liquid water forms. Your hair feels wet. Nothing “leaked.”
The fix isn’t a better cap. You need to break the three conditions that create condensation: high heat, long duration, and sealed air.
Lower the Temperature First
This is the highest-leverage move. The hotter your shower, the faster steam fills the air pocket inside your cap. Drop the water temperature — even a few degrees, staying closer to 35°C instead of 42°C — and condensation buildup slows down a lot.
Pair that with a shorter shower, and the effect compounds. Less time under hot water means less humid air building up inside the cap before you step out.
Ventilate the Bathroom While You Shower
Run the exhaust fan. Crack the window. Leave the door open a little. Pushing humid air out of the bathroom cuts the overall moisture level your cap sits in. Less moisture in the room means less condensation on the inner wall.
This costs nothing and takes no effort. The steam that fogs your mirror is the same steam pushing its way toward your cap’s interior.
Redirect the Showerhead Away from Your Head
Spraying hot water at your cap builds a localized heat dome — concentrated steam pressing hard against the cap surface. Angle the showerhead toward your body instead. An adjustable showerhead makes this easy and takes heat pressure off the cap’s outer shell.
Consider a Double-Layer Cap for Long, Hot Showers
Single-layer plastic caps trap everything inside — heat and humidity go in, nothing comes out. A double-layer shower cap with a waterproof outer layer and satin or terry inner lining breaks that cycle. The inner layer soaks up moisture, cuts down the heat-against-skin feeling, and stops condensation droplets from falling back onto your hair.
Satin linings cut friction and trapped heat. Terry linings soak up small amounts of condensation before they build up. Neither type wipes out moisture in a long hot shower — but both work better than a single-layer cap under the same conditions.
Priority order for troubleshooting right now:
Lower the water temperature
Shorten the shower duration
Turn on the ventilation before you step in
Redirect the spray away from the top of your head
Upgrade to a double-layer cap if hot, long showers are non-negotiable
Shower Cap Material Comparison: Which One Keeps Hair Dry?
The material matters more than the brand name on the tag. Most people learn this the hard way — after their hair is already wet.
Short answer: PEVA /vinyl caps and multilayer constructions do the best job blocking water. Everything else comes with a tradeoff you should know before buying.
The Material Breakdown
PEVA / Vinyl — the standard waterproof choice. It blocks splashes well and costs almost nothing to replace ($5–$10 for a decent one). The downside: thin single-layer versions crack and lose elasticity over time. Once the seams split open, there’s no fixing it.
Silicone — the tightest seal of any material. It fits the shape of your head better than plastic. The catch, flagged across many user reviews: it runs warm. For a five-minute rinse, that’s fine. For a long shower, it gets uncomfortable.
Coated cotton / PUL-lined fabric — the reusable, machine-washable option. Performance lands in the medium-to-high range, but only if the coating is of quality and the seams are sealed tight. The fabric itself isn’t waterproof. The coating does all the work. Once that coating wears down, the cap soaks up water like a sponge.
Pure cloth / unlined fabric — soft, low-friction, and useless for keeping hair dry. It works as a styling wrap. It doesn’t work as a waterproof barrier.
Single-Layer vs. Double-Layer: The Real Difference
A single-layer plastic cap traps heat, humidity, and condensation inside. A double-layer cap (waterproof outer shell + satin or microfiber inner lining) splits the job into two parts. The outer layer blocks water. The inner layer handles moisture buildup and cuts down on friction against your hair. That split function is exactly why double-layer caps outperform single-layer caps in real use — and the gap gets bigger during longer showers.
How to Match Material to Your Situation?
User Type | Best Pick | Why |
|---|---|---|
Occasional use | PEVA/vinyl | Cost-efficient, effective, easy to replace |
Daily use | Multilayer coated fabric | More durable, holds up to washing |
Thick hair / curls | Oversized double-layer or silicone-seal | More internal room, fewer gap points |
Short showers | Silicone | Tight seal, easy to clean |
Long hot showers | Double-layer with inner lining | Manages condensation, more breathable than silicone |
The Must-Have Checklist
No matter which material you pick, a cap that keeps hair dry needs all five of these:
Waterproof outer layer (not just water-resistant)
Reinforced elastic band that holds its shape after repeated use
Sealed seams — stitched seams without seam tape are a weak point
Double-layer or triple-layer build for condensation control
Correct sizing — go oversized for long or thick hair, not a one-size-pulls-tight fit
Skip one of these, and the material alone won’t save you.
The practical ranking, for a straight answer: a well-made multilayer PEVA cap is the best choice for most people. Silicone comes second for fit and seal. Coated fabric is the smart long-term buy. Pure cloth doesn’t belong in this list if keeping hair dry is the point.
How to Choose a Shower Cap That Fits (Size & Design Guide)
Most shower caps say “one size fits most.” Most shower caps lie.
A cap that’s too small doesn’t just feel uncomfortable. It can’t hold a seal. The elastic pulls tight, lifts at the edges, and water gets in. Size is everything here.
Measure Your Head Before You Buy Anything
Grab a soft measuring tape. Wrap it around your head — about 1/8 to 1 inch above your ears, across the middle of your forehead. Hold it snug but not tight, like a well-fitting hat. Take the measurement twice. Use the larger number.
Here’s where most people land:
Under 55 cm — small head; standard “one size” caps may wrinkle at the edges and leak
55–58 cm — standard adult range; most one-size caps are built for this
59 cm and above — one-size caps need to stretch an extra 2–4 cm. That strains the elastic, flattens the interior, and pushes thick or curly hair out of place
Above 59 cm? Skip the “fits most” label. Look for Large, XL, or caps listed at 45–65 cm diameter.
Match the Cap Diameter to Your Hair Volume
Head circumference is just one part of the equation. Dome depth and overall diameter decide whether your hair fits inside without pushing the edge outward.
45 cm diameter — works for most straight to medium-volume hair
65 cm diameter — built for high-volume curls, thick braids, locs, or waist-length hair; the interior surface area is about 1.3x larger than a 45 cm cap
For thick hair or large buns, go with a cap that has a dome depth of at least 12–15 cm. A shallow dome presses hair into the seal line. That pressure creates gaps and lets water in.
Design Details That Affect the Seal
Elastic band width matters more than most product listings admit. A band narrower than 1 cm has to stretch further on larger heads. That concentrates pressure in a narrow strip and digs into the skin. A 2–3 cm wide band spreads that pressure out. It holds its shape longer and sits flat across uneven hairlines.
Tapered or rolled edges work better than straight-cut edges. A tapered edge angles inward against your skin. It follows the curve of your forehead and the back of your neck. Straight edges sit flat, and flat edges gap at curves.
The Quick Buying Checklist
Measure your head circumference — don’t guess
Head ≥ 59 cm or thick/curly hair? Go straight to XL or 65 cm diameter
Check dome depth: 12+ cm for high-volume hair
Look for a wide elastic band (2 cm or more)
Pick a tapered edge over a straight edge — this matters more if your hairline isn’t uniform
One size does not fit most. The right size — matched to your measurements — solves more leakage problems than any material upgrade ever will.
Shower Cap Maintenance: How to Keep It Waterproof Longer
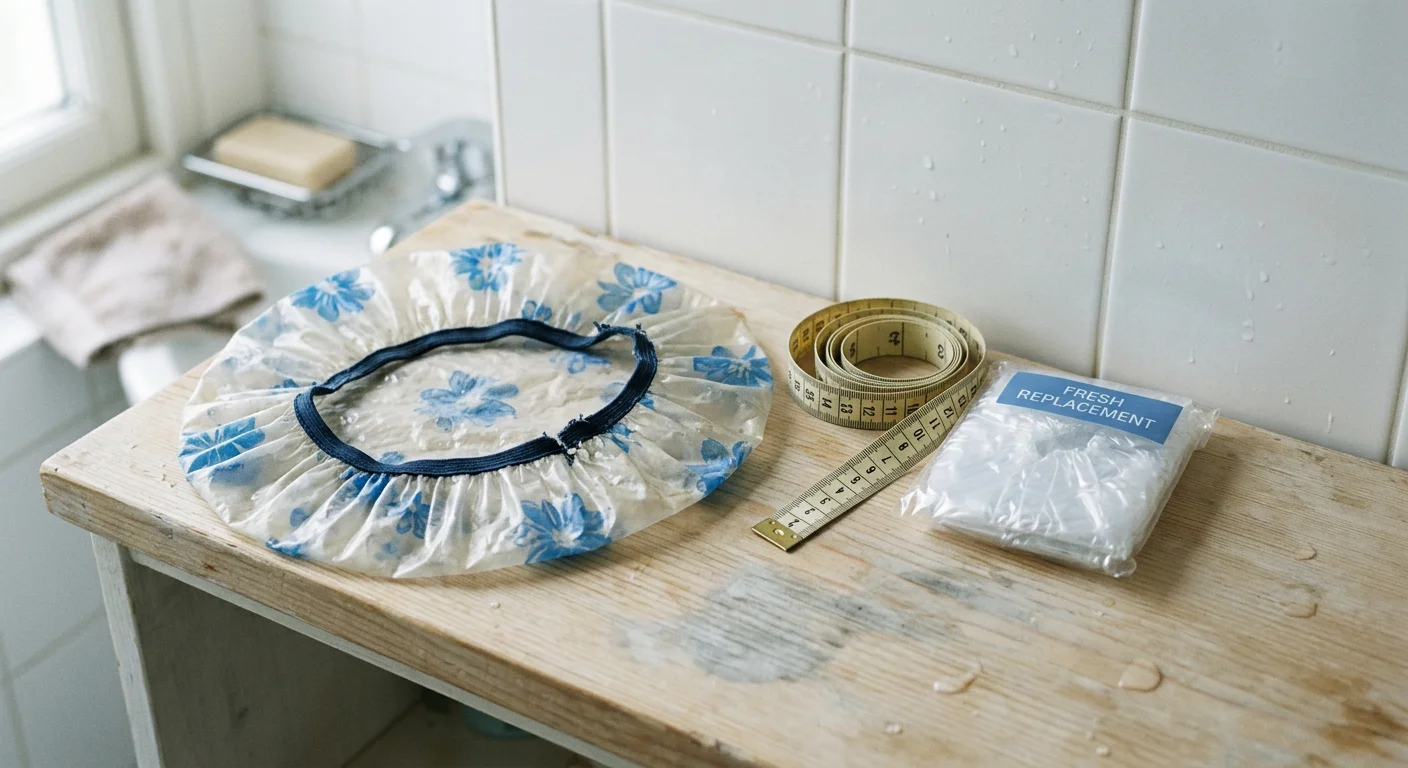
A good shower cap doesn’t fail all at once. It breaks down one hot shower at a time — one hasty fold, one damp storage bag — until the day it stops working. And you won’t be able to point to the moment it went wrong.
Most of that damage is preventable.
What’s Wearing It Down?
Three things kill waterproofing faster than normal use:
Product residue. Hair oils, conditioners, and styling products coat the inner surface. Over time, they break down the material’s coating from the inside. Do you use leave-in treatments or oil-based products often? Clean your cap closer to every two weeks, not four.
Heat. Hot steam feels great in the shower. For your cap, it’s a problem. It speeds up elastic fatigue and creates micro-cracks in the outer layer. Humidity inside a sealed cap can exceed 90%. That environment doesn’t just affect your hair — it works on the cap material too.
Storing it wet. Folding a damp cap into a bag traps moisture against the material. That leads to odor, coating breakdown, and elastic failure — faster than anything else.
Cleaning by Material
Coated fabric caps — machine wash at ≤ 30°C, air dry only. Heat breaks down the coating far faster than water does.
PEVA / vinyl caps — hand wash in warm water, then hang until bone dry. Heat causes these to crack and lose shape.
Silicone caps — mild soap and water. Avoid anything abrasive or harsh.
How often? Every 2–4 weeks as a baseline. Push it closer to two if you apply oils or styling products before most showers.
Storage: Hang It, Don’t Bag It
Method | Works Well When | Watch Out For |
|---|---|---|
Hung on a hook or towel bar | Daily use; best for fast drying and keeping elastic shape | Takes up visible space |
Sealed in a bag | Travel or short-term storage — only if fully dry first | Traps moisture if packed damp; speeds up breakdown |
Here’s the default routine: shake off the water droplets, flip the cap inside out to let it air out, and hang it somewhere with good airflow. Keep it away from heat vents and radiators. Let it dry all the way before it goes near a storage bag.
When to Replace It?
Stop waiting for a dramatic failure. These signs mean it’s already done:
Elastic feels loose or sits unevenly against your head
Edges curl or gap without any pressure
Surface feels tacky or brittle
Seams are pulling apart
Any one of these means the waterproofing is gone. The cap won’t recover. Replace it — and this time, store the new one dry.
Conclusion
A wet shower cap isn’t a small annoyance — it’s a sign that something in your routine isn’t working. The good news? It’s almost always fixable.
The fix comes down to three things: the right fit, the right material, and the right technique. Start with a cap that sits snug against your hairline. Make sure it’s built with a real waterproof layer — not just thin plastic. Tuck all your hair inside before stepping in. That combination changes everything. Add a quick cooldown trick to cut condensation, and your hair stays dry from start to finish.
You don’t need to tolerate damp hair or a ruined blowout anymore.
So if your current cap keeps letting you down, it might just be the wrong tool for the job. Check out Morntrip ‘s double-layer shower caps — built for thick hair and real waterproofing. Protecting your hair shouldn’t require a workaround.
Dry hair is the baseline. Now go get it.