A lab coat’s crisp, professional look can disappear fast—one wrong iron setting leaves a shiny patch, a scorch mark, or a collar too limp to hold its shape. If you’ve ever tried to iron a lab coat without turning the white fabric yellow or melting your polyester blend, you’re not alone. Fabric matters more than most people realize: cotton and polyester react very differently to heat, so what works for one can ruin the other. Below are the exact temperature settings, ironing order, and pressing techniques that keep lab coats sharp through shift after shift, plus the mistakes that quietly damage fabric over time and how to avoid them for good.
Before You Iron: Check the Care Label
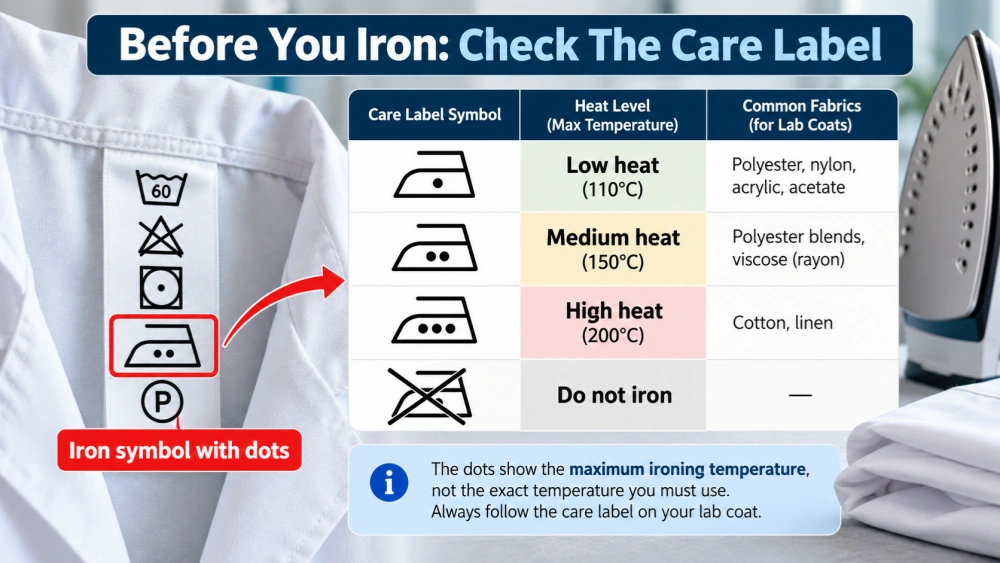
Always check the care label inside your lab coat before ironing. The label tells you whether the coat can be ironed and how much heat the fabric can safely handle.
Some care labels use an iron symbol with dots inside it:
Iron Symbol | Heat Level | Maximum Temperature |
|---|---|---|
1 dot | Low heat | 110°C |
2 dots | Medium heat | 150°C |
3 dots | High heat | 200°C |
Crossed-out iron | Do not iron | — |
The dots show the maximum ironing temperature, not the exact temperature you must use.
For example, polyester lab coats usually need lower heat, while cotton lab coats can normally handle higher temperatures. Blended fabrics may require a lower setting than pure cotton.
If the label gives a specific temperature or ironing instruction, always follow that information first. Do not rely only on the fabric type.
How To Iron A Lab Coat Step By Step
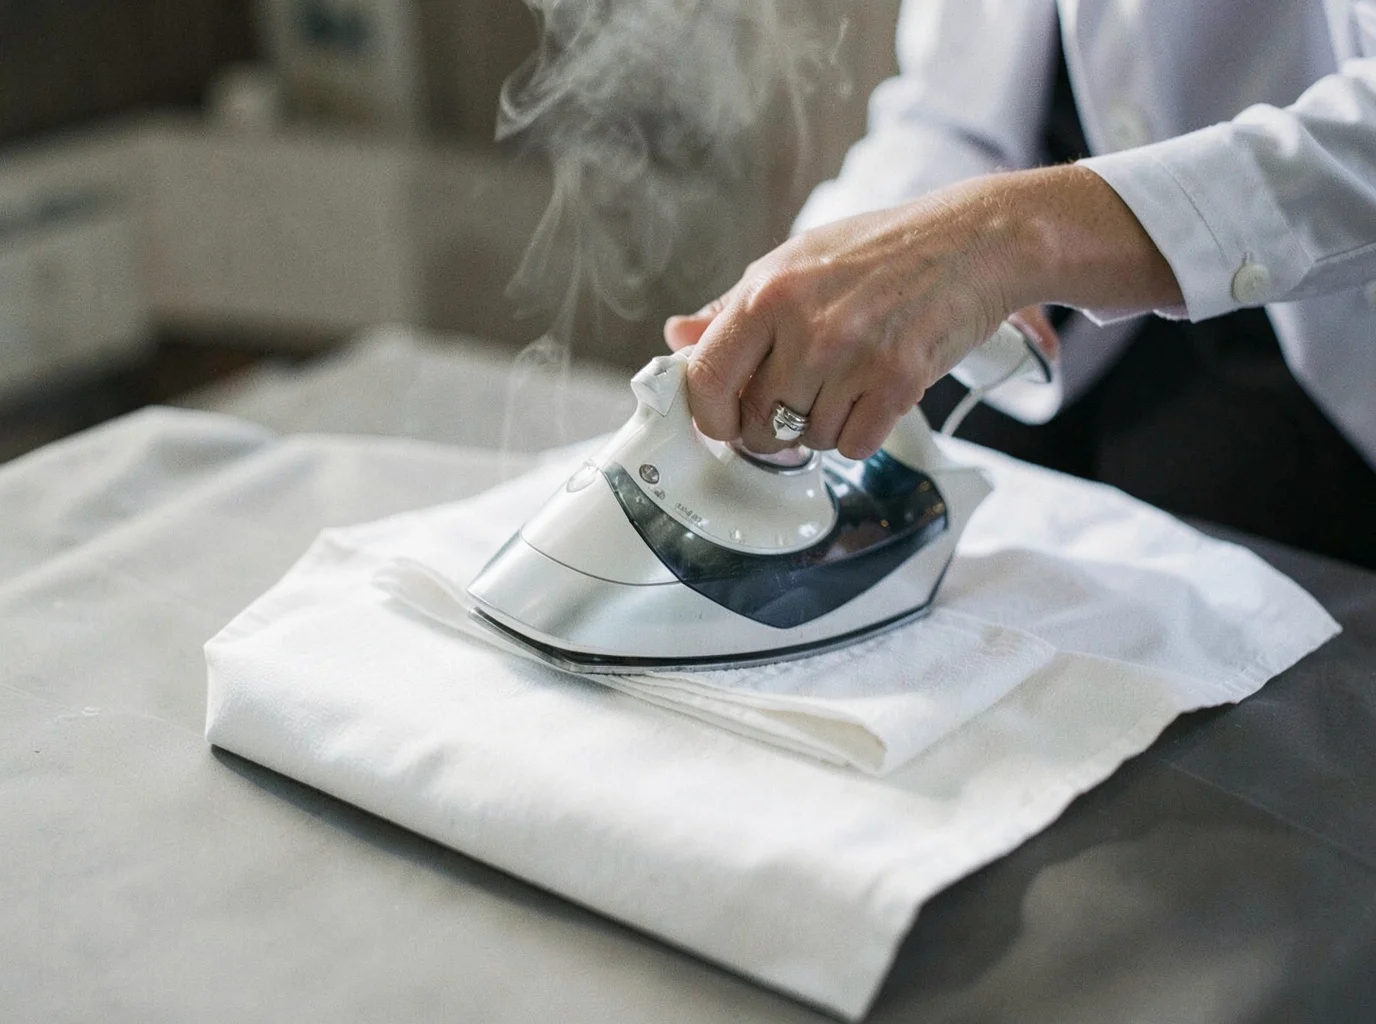
Ten steps stand between a wrinkled lab coat and one that looks like it just came off the hanger. Follow them in order, and you’ll cut ironing time while protecting the fabric.
1. Wash, Then Dampen
Start clean. A lab coat with stains or residue will bake those marks in permanently once heat hits them. Pull the coat from the dryer while it’s still slightly damp, or mist a dry coat with water from a spray bottle. Damp fabric releases wrinkles faster than dry fabric. This single step saves you several passes with the iron.
2. Match The Iron To The Fabric
Cotton lab coats
: hot iron, steam on. Cotton tolerates high heat, so use it.Cotton-poly blends: medium heat only. Push too hot, and polyester threads glaze over, leaving a shiny mark you can’t undo.
Full synthetic/polyester: low to medium heat. This is where most scorch damage happens. People assume “hotter is faster” and end up melting the fabric surface instead.
3. Flip The Coat Inside Out
Turn it over before you start pressing. Ironing on the reverse side protects the outer finish, especially on darker trims or printed logos that can’t handle direct heat.
4. Press The Pockets First
Flatten pocket openings and press them before touching the main body. Pockets create bulk. If you skip this step, that bulk shows up as bumps under the front panels later.
5. Start At The Collar
Move to the collar next. It’s the first thing people notice, so it gets first priority. Press it flat, then work outward to the lapels and front panels. Those are the most visible parts of the coat.
6. Iron The Front Panels In Sections
Work in small sections rather than dragging the iron across the whole panel at once. Use steam or keep the fabric slightly damp here; this is how you remove wrinkles from a lab coat without leaving crease lines that weren’t there before.
7. Handle The Sleeves With Care
Lay each sleeve flat on the board. Press from shoulder to cuff in one direction. Avoid pressing directly over seam lines. Doing so can create a hard crease that looks more like a fold than a clean line.
8. Finish The Back Panel
Flip the coat and iron the back last. It’s the largest flat surface, so it goes quickly once everything else is done.
9. Press Pleats Into Place
If the coat has pleats, press them deliberately rather than flattening the fabric around them. Pleats hold their shape better when you press with the fold.
10. Hang And Let It Cool
Don’t wear the coat immediately. Hang it and let the fibers cool completely. This is what locks the pressed shape in. Skip this step, and creases relax before you even leave the house.
One More Thing: Watch The Details
Never run the iron directly over knit cuffs, plastic buttons, or logos. These melt or warp fast, even at moderate heat. If a section feels risky, slide a press cloth between the iron and the fabric. It adds a layer of protection without slowing you down.
Lab Coat Ironing Temperature By Fabric
Every fabric has a heat ceiling, and pushing past it is how good lab coats turn into ruined ones. Here’s the breakdown by material, so you’re not stuck guessing mid-iron.
Fabric Type | Iron Temperature | Steam | Notes |
|---|---|---|---|
Cotton | High heat, up to 200°C | Yes | Iron while slightly damp for fastest wrinkle removal |
Polyester | Low heat, up to 110°C | Little to none | Iron inside-out to avoid shine or melting |
Poly-cotton blends | Medium heat, up to 150°C | Light steam okay | Always use the lower fiber’s setting, never the higher one |
Wool/silk/ | Medium heat, up to 150°C | Light steam okay | Treat like a delicate, err cooler if unsure |
Blends always follow the weaker fiber. A poly-cotton lab coat is polyester wearing cotton’s confidence. Iron it like cotton, and you’ll melt the synthetic threads before the cotton even feels warm.
What Suppliers Actually Recommend?
Uniform suppliers who make lab coats for a living land on a middle-ground answer. They recommend a medium-hot iron for cotton coats and give a firm rule: never iron knit cuffs or plastic buttons directly. That guidance shows up again and again across care instructions, and it matches what most hospitals and labs do day to day. When in doubt, low-to-medium heat with steam covers the most fabric types without damage, especially on coats with logos, embroidered names, or button closures.
The Reverse-Side, Two-Cloth Method
If a lab coat’s care label is worn off or missing entirely, one laundering guideline solves the problem. Iron on the reverse side, sandwiched between two cloths, with a steam iron. This method works as a safe default for almost any fabric because it buffers the heat before it reaches the fibers. It’s slower than pressing directly, but it’s the safest bet when you’re not 100% sure whether you’re holding cotton, polyester, or a blend.
How To Protect Logos, Embroidery, And Buttons
Embroidered logos and name patches fray, fade, or crack faster than the rest of the coat if you care for them badly. Protection starts in the wash, before the iron comes out.
Wash Prep
Turn the lab coat inside out before it goes into the machine. That cuts down on abrasion from the drum and stops zippers or buttons on other clothes from snagging the threads. Then fasten every button, zip, and Velcro strip on the coat. Loose fasteners flap around during the cycle and catch on stitching, pulling threads loose one wash at a time.
Use a gentle or delicate cycle with water between cold and 40°C. Most instructions recommend 30–40°C. Skip the bleach and optical brighteners. Both discolor embroidery thread over time, even on white uniforms.
Drying And Handling
Air dry when possible. If you use a dryer, set it to low heat and pull the coat out while it’s still slightly damp. That protects both fabric and stitching from thermal stress. Never wring or twist a wet lab coat, and don’t leave it balled up while damp. Embroidery fibers are weakest when wet, and that kind of handling stresses them.
Protecting Logos During Ironing
When you press the coat, never run the iron directly over the logo or patch. Flip the coat inside out, or put a pressing cloth between the iron and the decoration. Either method buffers the heat enough to prevent melting synthetic thread or flattening raised stitching.
Care guides differ slightly on the numbers. Some say embroidered logos last 5+ years with inside-out washing and low-stress drying. Others say well-maintained embroidery lasts the life of the coat essentially. What matters is consistency: inside out, gentle cycle, mild detergent, no direct heat. Follow that checklist every wash.
Common Lab Coat Ironing Mistakes

Most scorched collars and shiny cuffs trace back to the same handful of habits. Here’s what actually goes wrong, and why it keeps happening even to people who’ve ironed a hundred lab coats before.
Ironing over stains before treating them. Heat sets protein and oil stains permanently, especially on white fabric. If there’s a coffee splash or an ink smudge on the coat, treat it first. Press it with heat, and you’ve just locked that stain in for good.
Trusting a single temperature for every lab coat. Industry guidance caps ironing around 150°C for most coats, but that number isn’t universal. A 100% cotton coat can often take 150°C or higher. Polyester wants closer to 110–130°C. Treat every coat the same, and you’ll either scorch the synthetic or leave the cotton wrinkled.
Pressing synthetics like they’re cotton. Polyester and poly-cotton blends need light pressure and low heat, full stop. Leaning into the iron the way you would on heavy cotton twill creates glossy patches that never come out. Flip the garment inside out, use light steam, and let the iron glide instead of pressing down hard.
Dry-ironing cotton that’s fully wrinkled. Bone-dry cotton fights back. Steam or a light mist loosens the fibers so wrinkles release with one or two passes. Skip the moisture, and you’ll be going over the same crease five times, which adds unnecessary heat exposure to the fabric.
Assuming a wrinkle-resistant coat needs the same routine. Some medical coats are built to skip ironing altogether. Their wrinkle control comes from how they’re dried and hung, not from heat. If a coat is labeled wrinkle-resistant or no-iron, running a hot iron over it anyway is a step backward.
Forgetting that ESD or specialty coats have their own rules.
Static-dissipative lab coats sometimes carry specific guidance, with one published product spec listing an ironing temperature up to 150°C. That’s higher than what many synthetics tolerate, so don’t assume ESD fabric behaves like standard polyester. Check the tag before you touch the iron to it.
Conclusion
A crisp lab coat signals competence before you say a word. Once you learn the basics, it’s simple: check the fabric, set the iron temperature for cotton or polyester, and work top-down—collar, cuffs, then body—so wrinkles don’t sneak back in.
Wrong heat means scorch marks or a sheen that screams “ironed in a hurry.” Right heat keeps your coat looking sharp shift after shift, wash after wash.
Treat it as a habit, not a chore. Pair these steps with proper lab coat washing care, and you’ll get months—maybe years—more wear. Keep this guide handy, skim it before your next shift, and notice the compliments a well-pressed coat draws. Small effort, steady payoff.