That funky smell and those stiff, cracked patches where your fingers bend are signs your rubber gloves are on borrowed time. Most of us are speeding up their demise without realizing it. We toss them in with the laundry, let them air-dry crumpled in a ball, or just ignore the grime building up inside until they’re more gross than useful.
Cleaning rubber gloves takes a few steps most people skip entirely. We’ll walk through the right way to hand-wash them (and when machine washing is actually safe), how to banish odors and disinfect thoroughly, plus the drying and storage habits that keep them from turning brittle. Whether you’re working with latex, nitrile, or gloves exposed to harsh chemicals, you’ll find the specifics that make the difference between gloves that last months versus years.
How to Clean and Disinfect Rubber Gloves?
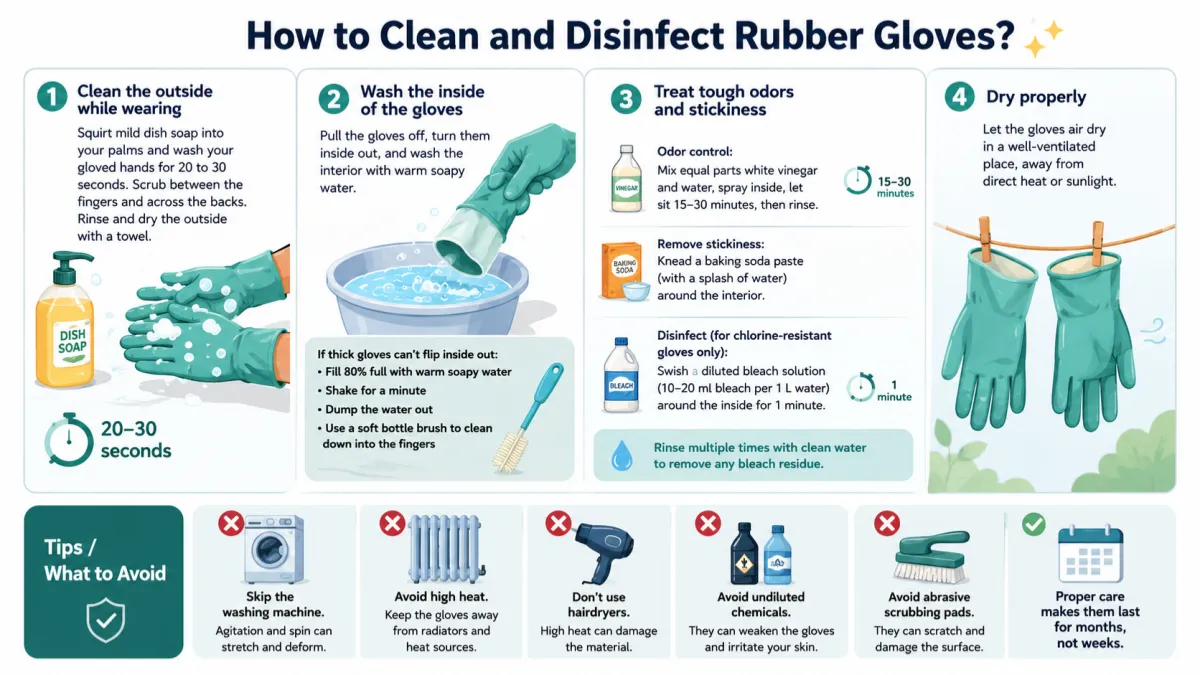
The easiest way to clean rubber gloves is while they are still on your hands. Squirt mild dish soap into your palms and wash your gloved hands for 20 to 30 seconds. Scrub between the fingers and across the backs. Rinse the gloves and dry the outside with a towel.
Wash the inside of the gloves. That humid environment traps sweat and bacteria, creating a musty smell. Pull the gloves off, turn them inside out, and wash the interior with warm soapy water. If thick, heavy-duty gloves refuse to flip, fill them 80% full with warm soapy water, shake them for a minute, and dump the water out. A soft bottle brush helps reach down into the fingers.
Treat tough odors and stickiness. Regular soap cannot always fix a tacky interior. Mix equal parts white vinegar and water, spray it inside, and let it sit for 15 to 30 minutes to neutralize the smell. If the inside feels greasy, knead a baking soda paste made with a splash of water around the interior. For heavy-duty disinfection on chlorine-resistant gloves, swish a diluted bleach solution (10-20 mL of bleach per liter of water) around the inside for a minute. Rinse the gloves multiple times afterward so the bleach does not irritate your skin.
Skip the washing machine. The spin cycle and agitation stretch and deform the material over time. Stick to hand washing and avoid high heat. Keep the gloves off radiators and do not use hairdryers to speed up drying. Avoid undiluted chemicals and abrasive scrubbing pads. Let the gloves air dry in a well-ventilated spot so they last for months instead of weeks.
How to Dry and Store Rubber Gloves so They Last?
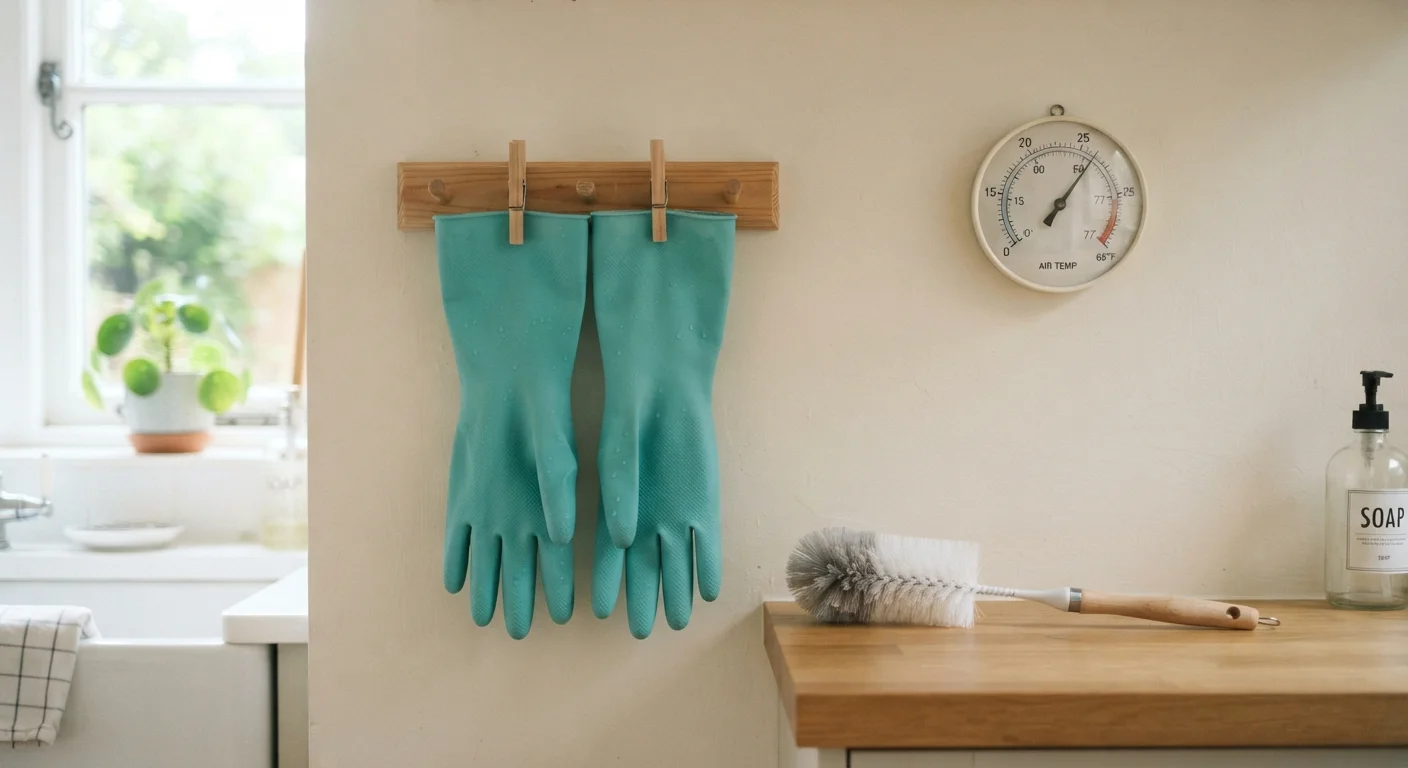
The sweet spot for drying and storing rubber gloves is ten to twenty-two degrees Celsius, and it’s narrower than most people assume. Push past that range near a radiator, heater, or steam pipe, and the rubber hardens, cracks, or turns tacky within weeks instead of months.
Dry Them the Right Way
-
Hang gloves fingertip-down in a well-ventilated spot. Skip the wringing or twisting; it stresses the material and speeds up fatigue.
-
Space gloves 2–3 cm apart if you’re drying multiple pairs. Overlapping traps moisture and slows evaporation.
-
Flip gloves inside-out first, dry that layer, then turn them back and finish drying the exterior.
-
For longer gloves, a low-speed fan helps move air through without blasting the material out of shape.
-
Lay absorbent paper or a towel over the surface and swap it out every 1–2 hours to pull excess water away faster.
-
A light dusting of talc, cornstarch, or baking soda inside prevents sticking and mops up leftover dampness.
Thick industrial gloves need 6–12 hours minimum at room temperature; humid environments can push that to 24 hours. Before storing, do the fist test. If the inside doesn’t feel cold and clammy, they’re dry enough.
Storage Habits That Extend Lifespan
-
Keep humidity under 60%. Mold and stickiness set in fast above that.
-
Store in a cool, dark place, away from ozone sources like welding equipment or electrical sparks, which cause surface cracking.
-
Never fold or crease gloves for storage. Creases concentrate stress and become cracks over time.
-
Lay gloves flat and unstacked, or hang them fingertip-down in a ventilated glove bag.
-
Keep them off concrete floors (moisture wicks up) and away from anything sharp or heavy that could press a permanent dent into the rubber.
Get the drying and storage routine right, and rubber gloves stop being a monthly replacement and start lasting the way they’re supposed to.
Eco-Friendly Methods and Care Variations for Latex, Nitrile, and After Chemical Exposure
Latex and nitrile don’t age the same way, and they definitely don’t return to the earth the same way. Knowing which glove you’re holding changes how you clean it, disinfect it, and eventually toss it.
Material Matters: Biodegradability Differences
Natural latex gloves come from rubber trees, a renewable resource. In compost or the right conditions, they can break down in just a few months. Standard nitrile gloves are petroleum-based synthetics that don’t degrade under normal conditions; industry estimates put full breakdown at decades. Biodegradable nitrile closes that gap with organic additives that let microbes convert the material into CO₂, CH₄, and water. These gloves are typically rated for 3–5 years, a fraction of standard nitrile’s timeline.
If you want proof this exists at scale, check labels. If You Care household gloves use FSC-certified natural latex with a cotton flock lining. They’re 100% renewable and compostable once shredded. Eco Living’s natural rubber gloves are plastic-free, biodegradable, and compostable. Hand-wash the exterior with soap and water, skip the dishwasher, then cut into pieces before composting. Most biodegradable nitrile brands are validated against ASTM D6400 or equivalent standards and are designed for single use around chemicals. Wear once, discard, done.
Cleaning and Disinfecting: Latex vs. Nitrile
|
|
Latex (Reusable) |
Nitrile (Disposable/Semi-Reusable) |
|---|---|---|
|
Water temp |
≤40–50°C |
≤50°C recommended |
|
Cleaner |
Mild soap, no strong solvents |
Neutral detergent, avoid oxidizers |
|
Disinfect |
Diluted vinegar or hydrogen peroxide |
Low-concentration bleach acceptable, but discard soon after |
|
Storage |
Cool, dark, away from ozone |
Cool, dry; more chemically stable but still ages |
|
Disposal |
Shred and compost |
Landfill or specialized composting if biodegradable |
For latex stains (food dye, tea, dirt): soak in a 1:3 vinegar-water mix for 10–15 minutes, or dab a baking soda paste (2:1 ratio) on the spot for 10 minutes before wiping. Lemon juice works too, but cap contact at 5 minutes. Longer than that and the acid starts embrittling the surface.
For nitrile stains , you can push harder. Soak in a 1:1 vinegar solution for 15–30 minutes for water-soluble dye, or use baking soda paste for oily residue. Strong dyes like ink often won’t fully release. Replace the gloves rather than risk chemical residue.
Emergency Steps After Strong Chemical Exposure
Latex exposed to straight bleach: rinse cold for 30–60 seconds, wash with neutral detergent, then wipe with a 1:4 vinegar solution to neutralize leftover hypochlorite. Check for stickiness, whitening, or cracking. Any of those means retire the glove immediately.
Nitrile exposed to solvents: Disposable gloves get rinsed briefly, then bagged as chemical waste. Never mix them with recyclables. Reusable thick nitrile gets a full 2–3 minute detergent scrub, plus a 1:3 vinegar wipe for chlorine residue. Check for swelling or fogging after.
FAQ
Five questions come up more than any others when people start paying attention to their rubber gloves. Here’s what the data and manufacturer guidance say.
Can I put rubber gloves in the washing machine?
For thick reusable PVC or Latex gloves , hand-wash them. Machine washing causes warping, micro-tears, and loss of grip texture. It cuts lifespan to 5–10 cycles instead of the 20–40 cycles you’d get hand-washing. If you’re going to risk it, use cold water under 30°C, a gentle cycle, low spin, and toss the gloves in a mesh laundry bag first. Skip fabric softener—it makes rubber tackier. Disposable latex and nitrile gloves are different. They’re single-use by design, and washing them tanks their barrier integrity. Pin-hole failure rates jump past 50% after one 40°C wash cycle, compared to a 1–3% baseline defect rate straight from the box. For PPE use in healthcare or food service, re-washing disposables violates standards like EN 374 and ASTM D6319. Don’t do it.
How often should reusable gloves get washed?
Exterior: after every use, no exceptions. Interior: every 3–5 uses, or once weekly minimum if you’re wearing them daily. Anything involving organic waste, bathroom cleaning, or pet messes needs a full inside-and-out wash every single session because microbial load spikes fast. Commercial kitchens should follow HACCP-style task separation, switching or washing gloves between raw meat and ready-to-eat prep.
How long do rubber gloves last?
Household reusable gloves hold up 1–3 months under regular use with proper washing and drying. Once you see cracks, soft spots, or thinning, stop washing and start replacing. Same goes for persistent odor that survives two full cleaning cycles.
Does latex or nitrile clean up better?
Latex is more sensitive to bleach and UV, and loses elasticity faster above 40°C washes. Limit bleach cycles to 1–2 per week max. Nitrile handles more frequent low-concentration bleach disinfection. It also handles machine washing better, but only if the manufacturer rates it as reusable PPE.
What stops gloves from turning sticky?
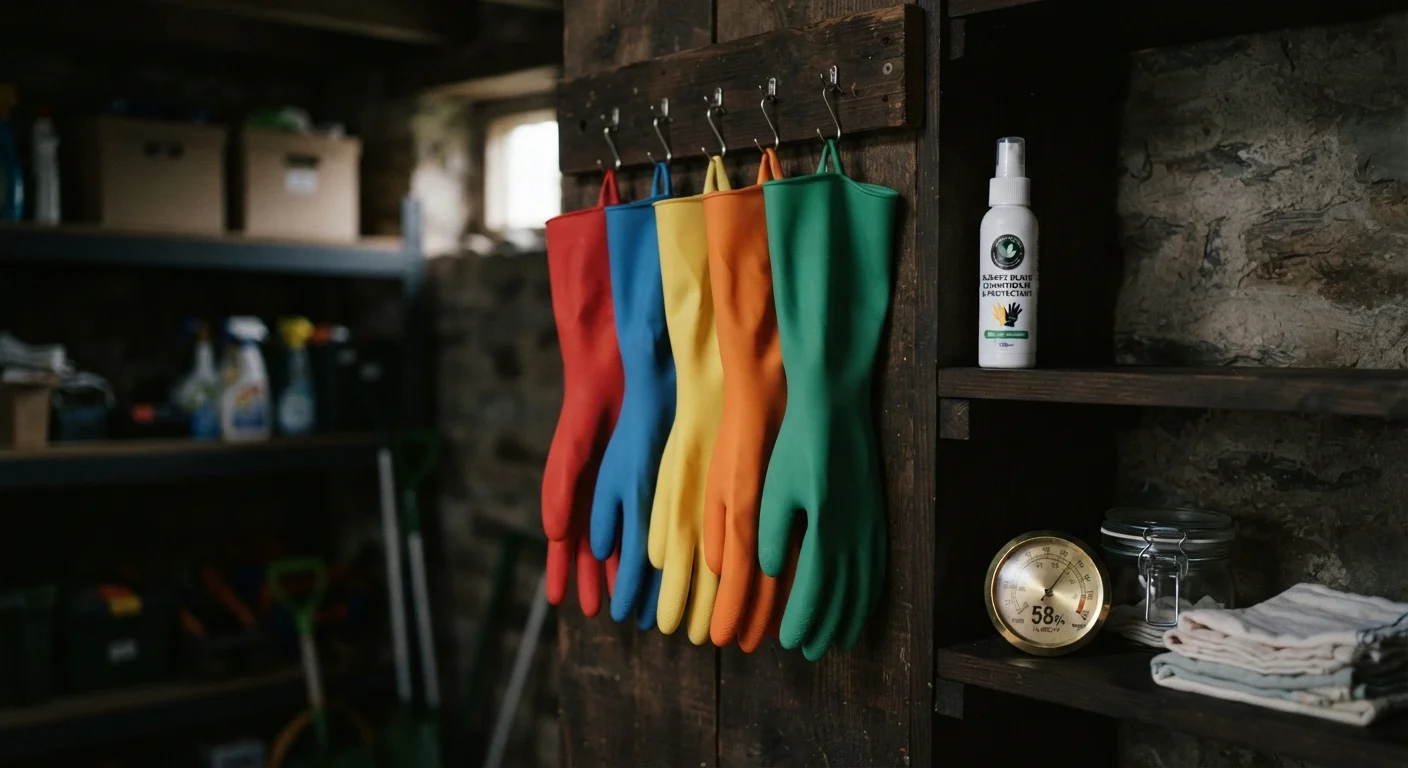
Store them at 15–25°C, 40–60% humidity, away from sunlight and ozone sources like motors. A silicone-based conditioner spray, wiped thin, cuts surface friction and delays cracking.
Conclusion
Keeping your rubber gloves in top shape comes down to three habits: wash them after every use (by hand for longevity, or carefully by machine when you’re in a hurry), dry them completely inside and out before storage, and match your cleaning method to the material—latex, nitrile, and chemical-exposed gloves each have their own quirks. Do this consistently, and a single pair of rubber gloves can outlast a dozen pairs treated carelessly. That’s real money saved and less waste piling up in landfills.
So don’t wait for your gloves to crack, stink, or turn stiff before taking action. Grab a pair right now, give them a quick inspection, and start the habit today—turn them inside out, air them properly, and store them away from heat and sunlight. Your hands (and your wallet) will thank you the next time you reach for a clean, ready-to-use pair instead of tossing another one in the trash.