Pick up two disposable coveralls that look identical on the shelf — same color, same price, maybe even the same claimed protection level. Tear one open and wear it through a 10-hour shift in a chemical spray environment.
The gap between walking out protected and walking out exposed comes down to decisions made long before that garment reached your hands. Which grade of polypropylene fabric was chosen? Were the seams sewn or welded with sound waves? How tight were the elastic cuffs? Was the zipper front reinforced?
Most buyers never see those decisions. They just live with the consequences.
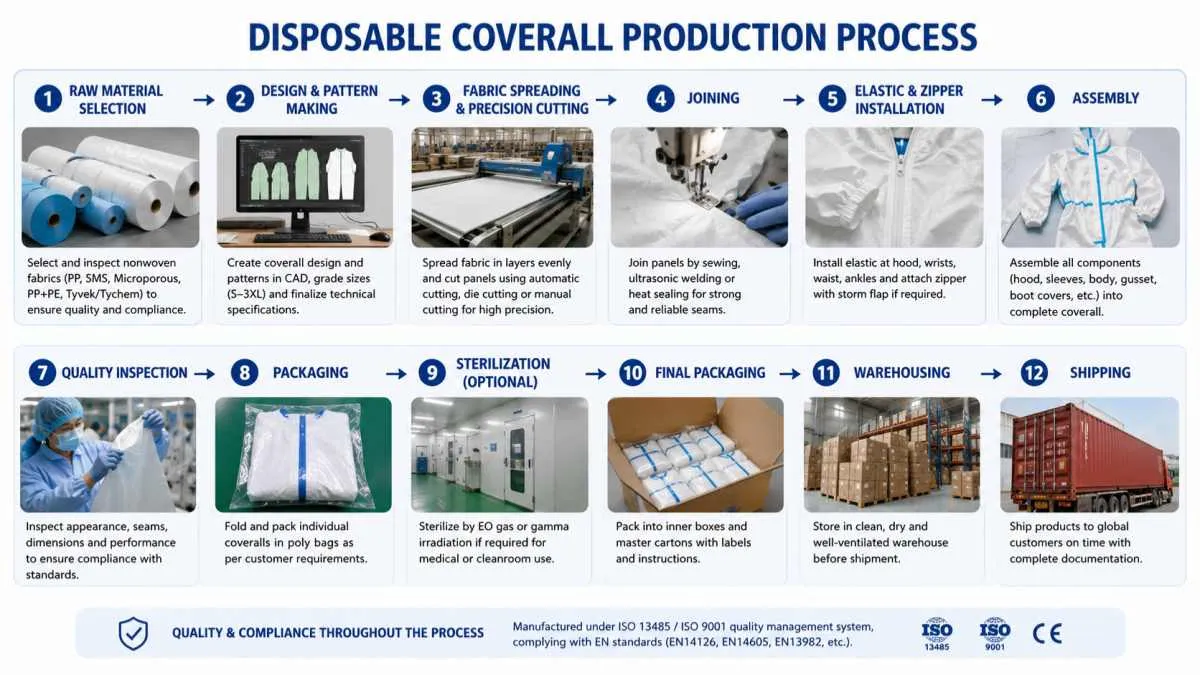
This guide breaks down the complete disposable coveralls manufacturing process , step by step. You’ll see exactly what goes into each garment — not just what the spec sheet says.
Why Does the Disposable Coveralls Manufacturing Process Matter?
The manufacturing process determines everything that matters about a disposable coverall . That includes its protection rating, its breathability, and whether it can pass regulatory certification for your industry.
That’s not marketing language. It’s a material reality.
Take a garment built from high-grade SMS nonwoven fabric. It has seams welded with ultrasonic bonding, elastic cuffs with firm tension, and a reinforced zipper front. That coverall sits in a different performance category entirely compared to one stitched together from the cheapest Polypropylene available. Both might carry the same label. Neither will perform the same way.
For procurement managers and safety professionals, knowing how disposable coveralls are made is the most reliable way to separate quality from risk. It cuts through product descriptions and gets to what the garment can do.
This guide covers the full process — from raw material selection to final packaging. You’ll know exactly what to look for and what you’re buying before the order goes through.
Step 1 — Raw Material Selection: The Foundation of Protection Performance
Every disposable coverall starts as a roll of fabric. What that fabric is made of drives almost everything that follows.
Five primary materials are in play, each built for a different set of demands:
-
PP Spunbond Nonwoven — The most common base material out there. It’s lightweight, breathable, and easy on the budget. Standard Polypropylene Coveralls in this category run between 30–65 GSM. That’s solid performance for low-risk environments — light dust, general maintenance. Just don’t expect it to handle liquids or chemicals.
-
SMS Fabric — Three layers stacked together: Spunbond / Meltblown / Spunbond. The meltblown core is what makes it different. Finer fiber density means better filtration and a real barrier against particulates and light splashes. You get breathability without giving up protection. That’s why SMS fabric dominates medical and light industrial use.
-
Microporous Film Laminate — A nonwoven base bonded to a thin breathable film. Liquid barrier performance steps up well beyond SMS here. Moisture vapor still escapes, so workers aren’t sealed in. This is the go-to choice for chemical spray or biological fluid exposure.
-
PP + PE Coated Fabric — Heavier build, stronger liquid resistance. Breathability takes a hit. You’ll find this in paint booths and certain chemical processing lines — places where splash protection matters more than comfort.
-
Tyvek / Tychem — DuPont’s top-tier materials. Flash-spun HDPE fibers pack serious protection against fine dry particles and chemical hazards. This is the gold standard for hazmat and industrial chemical environments.
What the Spec Sheet Doesn’t Always Tell You?
GSM is a starting point, not the full picture. A 40 GSM SMS fabric and a 40 GSM plain PP spunbond look the same on paper. In real use, they land in completely different performance categories.
Strong manufacturers check incoming materials against hard criteria: tensile strength, thickness uniformity, and contamination levels. They also verify supplier certifications — EN14126 for biological protection, EN14605 for liquid chemical resistance, EN13982 for solid particle barriers — before a single roll enters production.
That verification step is where real quality control starts. Skip it, and everything downstream is guesswork.
Step 2 — Design & Pattern Making: Translating Protection Needs into Garment Structure
Before a single blade touches fabric, someone has to answer one simple question: what does this garment need to do?
That question drives every design decision. And there are more of them than most buyers expect.
Hood or no hood. Elastic at the wrists, ankles, or waist — or all three. A storm flap over the zipper front. Thumb loops to keep sleeves from riding up. Boot covers are integrated or separate. Each choice isn’t cosmetic. Each one shifts the protection rating of the finished garment.
A coverall without a fitted hood leaves the neck exposed. Loose wrist openings break the barrier right where contamination enters first. These aren’t edge cases — they’re the failure points that show up in incident reports.
Once those decisions are set, the pattern goes digital. CAD software builds the individual panels — front and back body, sleeves, hood, crotch gusset, boot covers — with precise ergonomic allowances. The crotch gusset matters more than most people expect. Without enough room to move there, the garment limits posture and tears under load.
Size grading runs from S through 3XL. Each size scales by body proportion, not a flat stretch across the board. This keeps the fit functional at every size, not just the middle range. A well-built pattern layout also cuts material waste during production. You control costs without dropping material quality.
The pattern is where protection logic becomes a physical form. Everything built after this point follows what was decided here.
Step 3 — Fabric Spreading & Precision Cutting
Cutting fabric sounds simple. It isn’t.
At this stage, workers load rolls of spunbond nonwoven fabric, SMS fabric, or Microporous film laminate onto a spreading table. They layer the material into a flat stack. The layer count matters — and so does how flat each layer sits. Both factors decide whether every cut panel matches the one before it.
High-output facilities run automated spreading machines. These machines pull fabric from the roll at controlled tension. No wrinkles. No stretch. A single stack can hit 50 or more layers while keeping exact dimensions throughout. Smaller operations often spread fabric by hand. Layer inconsistency builds up fast that way — and inconsistent layers produce inconsistent panels.
The cutting process uses three methods:
-
CAD-driven automatic cutters — A computer-guided blade follows an optimized pattern file with sub-millimeter precision. It’s fast, repeatable, and the nesting algorithm cuts down on fabric waste by squeezing more panels from each roll.
-
Die cutting — A steel-rule die stamps out identical panels under pressure. This works best for high-volume runs with fixed panel sizes.
-
Manual pattern cutting — Still used in small-batch or sample production. It depends heavily on operator skill and takes more time.
Why Nesting Efficiency Has a Direct Impact on Your Unit Price
The nesting step is where material costs are won or lost. This is how pattern pieces get arranged across the fabric width before cutting begins. A well-optimized layout on SMS fabric coveralls can recover 8–12% of material that poor nesting throws away. Across a 100,000-unit OEM order, that adds up to a number worth tracking.
Reputable manufacturers run nesting software before every production run. It’s a detail that rarely shows up on a factory tour checklist — but you’ll see it show up in your landed cost per unit.
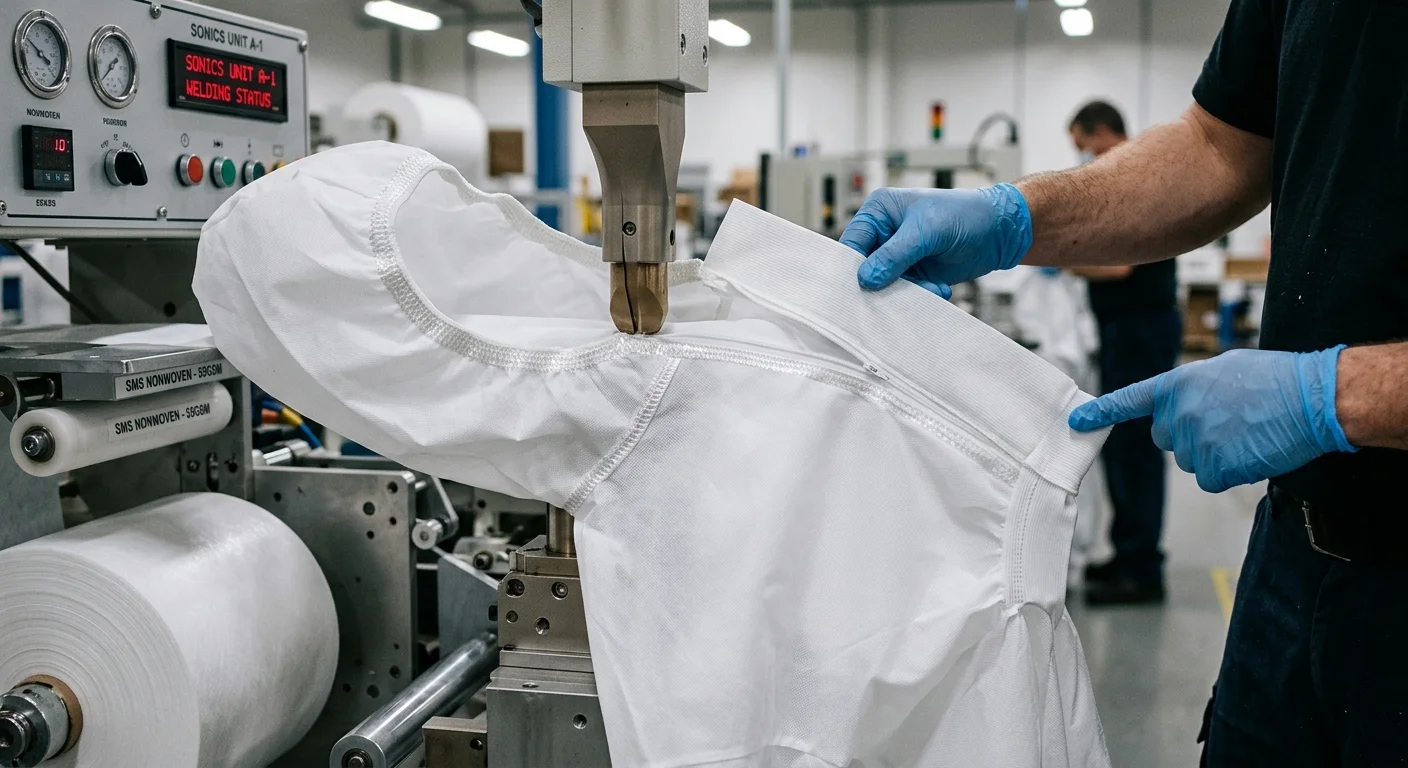
Step 4 — Joining Technologies: Sewing vs Ultrasonic Welding vs Heat Sealing
Three methods join cut panels into a finished garment. The one you choose determines whether that garment holds its protection rating under real conditions — or fails at the exact point that matters most.
Sewing is where most production starts. Industrial overlock machines run four-thread stitching. They pull front and back body panels together, attach sleeves, close side seams, and connect hood and boot covers in order. It’s fast and cost-effective. It works well for general-purpose polypropylene coveralls in low-to-medium risk environments. But the problem is mechanical. A needle punches hundreds of holes per meter as it runs. Every hole is a potential entry point for fine particles or liquid. For basic dust control, that’s acceptable. For chemical spray or biological hazard environments, it’s not.
Ultrasonic welding cuts out that tradeoff. High-frequency sound waves generate focused heat between thermoplastic layers — PP and PE nonwovens handle this well. The fibers fuse together with zero needle contact. No holes. No thread gaps. The seam becomes one solid, continuous bond. That’s why ultrasonic bonding is the standard joining method on SMS fabric coveralls and microporous film laminates used in serious industrial and medical settings.
Heat sealing runs on the same principle — thermal fusion instead of mechanical stitching. Manufacturers apply it to heavier laminate materials where ultrasonic frequency can’t penetrate at a consistent depth across the seam.
Seam Taping: Where It Becomes Non-Negotiable
Welded or heat-sealed seams still have limits. In high-hazard situations — biological fluid exposure, concentrated liquid chemical contact — manufacturers apply seam tape over every joined edge as a secondary barrier. The tape material and bonding process set the EN Type classification. Type 3 and Type 4 certified coveralls need seams taped across every join. Skip the tape, and the certification doesn’t hold.
The joining method you use here defines which regulatory certifications the finished garment can carry. Get it wrong, and no amount of fabric quality fixes it.
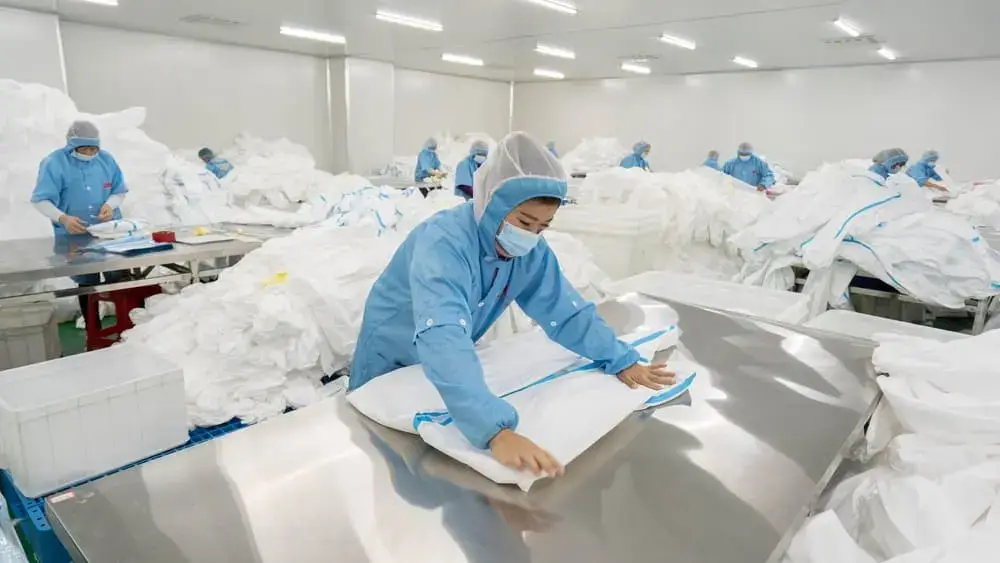
Step 5 — Component Assembly: Zippers, Elastics, and Functional Add-Ons
The fabric is cut. The seams are joined. Now the garment gets the details that decide whether it seals — or just looks like it does.
Zipper installation is where most of that difference happens. A sewn-in zipper works fine for low-hazard environments. A heat-sealed zipper front bonds to the fabric membrane. It removes the needle holes that standard stitching leaves behind. Over that zipper sits a storm flap — either self-adhesive or tape-secured — that covers the closure line from end to end. It’s a small addition. But it’s the line between a garment that holds its protection rating and one that leaks at the most obvious spot.
Elastic placement follows a tension logic, not a one-size standard. Wrist cuffs need a firm grip. They can’t cut off circulation during a six-hour shift. Hood openings seal around the face without making the worker wrestle their own coverall. Ankle elastics block ground-level contamination. Each tension spec gets set on its own — based on where it sits and what it needs to hold.
Functional Add-Ons: Where Durability and Compliance Meet
Past the core components, certain jobs need specific reinforcements:
-
Knee, seat, and elbow patches — added to coveralls built for heavy physical work, where fabric stress builds up under load
-
Thumb loops — hold sleeves in place at the wrist during movement, keeping the seal tight between coverall elastic cuffs and gloves
-
Anti-static cuffs — grounded contact points that meet ESD compliance requirements in electronics or explosive-risk environments
Every add-on listed here has to match the garment’s actual use environment. Thumb loops on a standard PP coverall cost next to nothing. Leave them out of a spray painting application, and you lose the protection the garment was built to deliver.
Step 6 — In-Process & Final Quality Control Testing
Quality control isn’t a checkpoint at the end of the line. It runs through every stage — from the moment fabric enters the cutting station to the second a finished garment gets folded into its bag.
In-process inspection catches problems early, before they stack up. At the seaming and welding stations, operators check every bonded join for integrity — no gaps, no partial fusions, no thread skips. Seam strength gets tested against pull-force thresholds. Operators measure panel dimensions against the original CAD spec on the spot. Component checklists confirm that every zipper pull, elastic strip, and storm flap is present and in the right position. Any garment that falls outside tolerance gets pulled right away. It doesn’t move forward.
Physical Performance Testing
Once garments reach the lab, the testing gets more structured.
Fabric samples and finished seams both go through:
-
Tensile and tear strength — how much force the material resists before it fails
-
Burst strength — pressure resistance across the fabric surface
-
Abrasion resistance — how the face side holds up under friction across a full work shift
The base fabric and the joined seams each get tested on their own. A seam that’s weaker than the surrounding fabric is a failure point waiting to open.
Protection-Specific and Certification Testing
This is where the garment either earns its classification — or doesn’t.
-
Liquid penetration resistance — synthetic blood and viral penetration tests for medical-grade coveralls ; hydrostatic pressure tests for chemical splash applications
-
Particulate filtration efficiency — barrier performance against fine dry particles for dust-control environments
-
Breathability (MVTR) — moisture vapor transmission rate, confirming the garment won’t trap heat to the point of heat stress
For specialized environments, more testing applies: chemical permeation resistance, anti-static performance for ESD-sensitive or explosive-risk sites, and flame retardancy where ignition risk is present.
Each of these ties into the EU’s EN standard classification system — Type 1 through Type 6 — and the corresponding ISO requirements. A coverall doesn’t carry a Type 3 or Type 4 rating because the label says so. It carries that rating because it passed the tests that define those categories. That’s the document trail any serious buyer should ask for before confirming an order.
Step 7 — Sterilization Requirements for Medical-Grade Coveralls
Not every disposable coverall needs to be sterile. Most don’t. The ones entering surgical suites, isolation wards, or biological containment zones play by a completely different rulebook.
Industrial-grade coveralls come out of standard production facilities. Medical-grade sterile coveralls demand controlled cleanroom conditions across the full production run — regulated airflow, strict particle counts, and tight personnel protocols. The factory environment becomes part of the product spec itself.
Two Sterilization Methods. Different Tradeoffs.
Ethylene Oxide (EO Gas) is the go-to method for nonwoven coveralls. It moves through the fabric without heat — that’s essential for SMS and microporous film materials, which thermal processes would break down. The catch: EO leaves chemical residues behind. The product has to go through a regulated off-gassing period before it ships. Residue levels must stay within FDA and EN ISO 11135 limits.
Gamma irradiation is faster and leaves no residual chemicals. The problem is material compatibility. Some nonwoven laminates break down under radiation exposure. That affects tensile strength and barrier performance — two things you can’t afford to compromise.
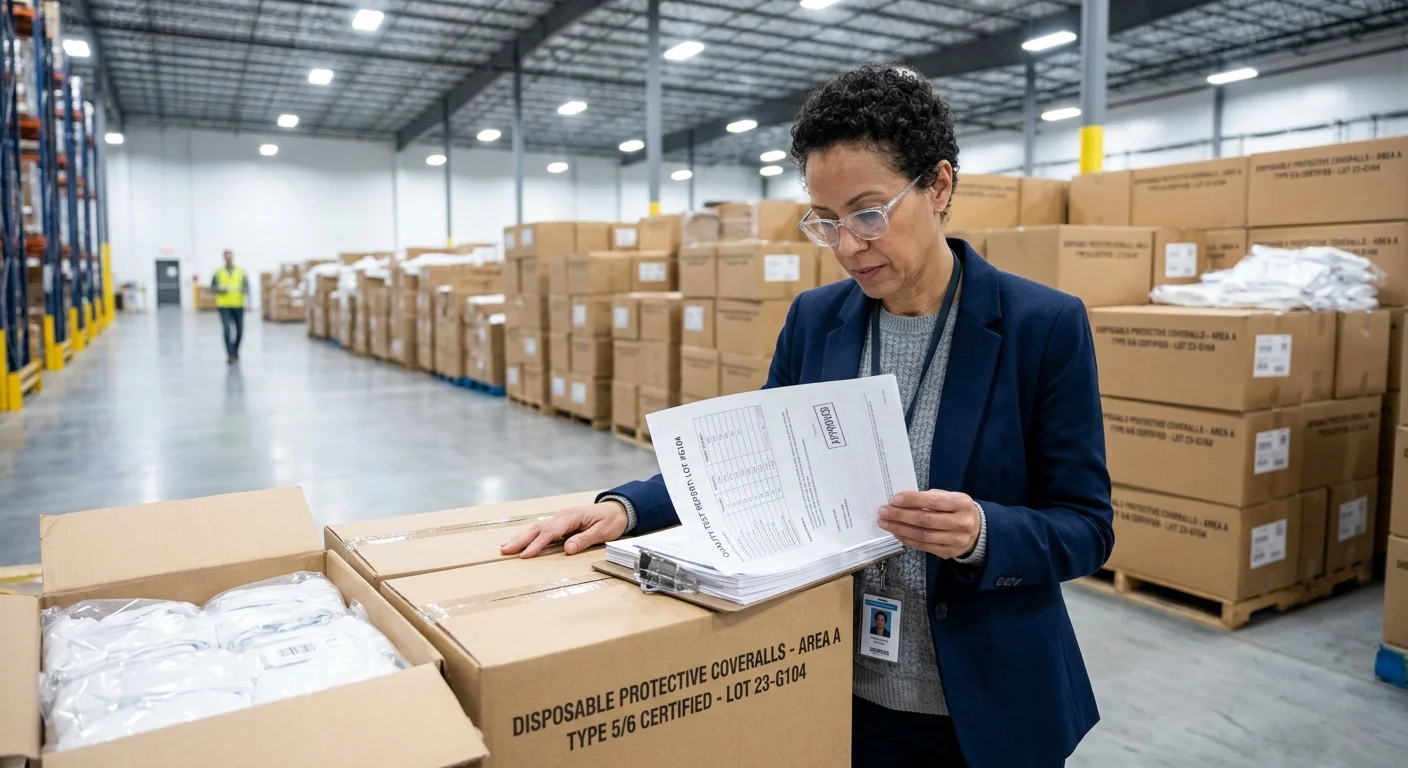
The Document Trail That Counts
A sterility claim with no paperwork to back it up means nothing in a regulatory audit. Medical-grade coveralls need:
-
SAL (Sterility Assurance Level) of 10⁻⁶ — one contaminated unit per million
-
Batch sterilization records linked directly to lot numbers
-
FDA 510(k) clearance or CE medical device registration — both require validated, documented sterilization protocols on file
Ask a supplier for those records. No records means the sterility claim on the box is just ink on packaging.
Step 8 — Folding, Packaging, and Labeling for Bulk Shipment
This is the last step before a coverall reaches your warehouse. Most buyers never think about it — until a shipment shows up damaged, mislabeled, or impossible to count.
Finished garments get folded to a set size. High-volume factories use folding machines. Every unit comes out the same size and stays compact. Smaller operations fold by hand. That’s slower, and the sizes can vary — which affects how many units fit in each carton.
Each coverall goes into its own Polyethylene bag. The label on that bag is not optional. It shows the size, model number, batch number, production date, and CE/EN standard markings. Remove any one of those, and you lose traceability on that unit.
What the Outer Carton Has to Get Right
Carton specs decide how a bulk order holds up through transit and storage:
-
Unit count per carton — fixed and consistent across the full production run
-
Barcoding — scannable at receiving, linked to lot records
-
Handling instructions — keep away from moisture, direct light, and temperature extremes
-
Export markings — shipping marks that meet customs requirements
A box that arrives wet, crushed, or unidentifiable adds real costs downstream. You lose time. You lose stock visibility. Good packaging at this stage protects all the work that the previous seven steps put in.
How to Evaluate a Disposable Coverall Manufacturer: What the Process Reveals
The manufacturing process doesn’t lie. Every shortcut a disposable coverall supplier takes shows up somewhere. A seam gaps under pressure. A GSM figure fails on a calibrated scale. A Type 4 claim has no taped seams behind it.
Here’s how to read the process like a buyer who knows what to look for.
Five Questions That Separate Real Manufacturers from Box-Movers
Ask these before placing any order:
-
What joining method do you use — sewing, ultrasonic welding, or heat sealing? Any supplier claiming chemical splash protection on a sewn-seam garment is a red flag. Walk away.
-
How do you verify incoming GSM? Reputable factories test every roll against documented thresholds. “We trust the supplier” is not an answer.
-
At what production stages does QC inspection happen? Look for in-process checks at multiple stages. End-of-line sampling alone is not enough.
-
Can you provide third-party EN certification test reports? Batch-specific reports. Not a generic brochure certificate.
-
What is your OEM minimum order quantity, and what does customization cover? Get the full scope — materials, GSM, seam type, and packaging.
Red Flags That Show Up in the Process Data
-
Fabric under 30 GSM listed for chemical or biological hazard environments
-
Type 4 or Type 5 claims on garments with no seam tape — no certification body will pass these
-
No third-party test documentation — just self-declared spec sheets with no lab backing
Working with an OEM Partner
Submit your requirements as hard specs. List the material type, GSM target, seam joining method, required certifications, and packaging format. A credible manufacturer takes you through sampling first. Then, small-batch validation. Then full-scale production — in that order. No skipping steps.
Sourcing disposable coveralls wholesale or placing a bulk order? Request samples and test reports before committing to volume. That’s not caution. That’s how serious procurement works.
Conclusion
Manufacturing disposable coveralls isn’t simple — and that’s the point.
Every step matters. From raw material selection to final packaging, each stage leaves a fingerprint on the product your workers depend on. You now know what sets an SMS fabric coverall apart from a bargain-bin option — the seam construction, the barrier film integrity, the elastic cuff finish. So you’re no longer just buying a price. Your buying decision.
That knowledge is your competitive edge.
Sourcing disposable coveralls for industrial, medical, or hazardous environments? The right manufacturer will walk you through their full process — no hesitation, no vague answers. Step by step, detail by detail.
At Morntrip , we do that — and then some.
Ready to see these standards in action? Request a sample or speak with our product specialists today — the best procurement decisions start with the right conversation.